How to adjust the contrast/brightness of the monitor (screen) image on a laptop?
Contrast comes from the English word “contrast”. Any monitor has it, be it a TV, computer, laptop or even mobile phone. But, most often it is necessary to adjust the screen contrast specifically for the computer. If you know the algorithm of action, then this will not be difficult. Contrast is the ratio of the brightness of the lightest part of the screen to the darkest part of the screen. Settings can be made using the buttons on the monitor. Correctly adjusted contrast will improve the perception of text and images. It will also provide realistic color reproduction when it comes to digital images.
How to Adjust Contrast on Windows
So, your equipment can be of any brand (trade manufacturer), but the Windows operating system must be installed. When the computer boots, the logo of this system appears on the screen. Also, already when the computer is turned on, it is displayed on the “Start” button. Most residents of our country have just such an operating system installed.
So, you need to use monitor color calibration. Calibration will help you adjust not only contrast, but also other color parameters as needed. Everything must be selected exclusively for yourself, but focus on average indicators.
The setting method will depend on the monitor:
Some monitors have a brightness and contrast button on the front panel. Some monitors may have these controls on the back panel. Standard symbols for each characteristic will be used.
On-screen menu. For some types of monitors, as well as for laptops, configuration is done using the on-screen menu. You can find it in the “Menu”, which will open when you click on the “Start” button. You can view the original values and set your own.
Laptop screen. It will be possible to use the brightness button on the front panel, but in older models. IN modern models There is no contrast control. Therefore, you will need to use the Fn key and click on the and icons to decrease or increase the contrast, respectively.
What are the optimal settings?
A computer screen has its own standard contrast settings that must be adhered to for comfortable work. Despite the fact that all people are different and the requirements for images may be different.
The image frequency on modern monitors is recommended in the range from 60 to 85 Hz. As for brightness, it should not be higher than 80 candelas per square meter. High contrast (this, as we have already found out, is the ratio of the brightness of black and white) is capable of making the image as clear as possible. The higher the contrast ratio, the faster your eyes will get tired. The optimal setting should be made taking into account the middle on the scale offered by the manufacturer.
Interesting! Using the NTest program, you can select the most accurate screen settings for yourself, and then set them on your computer.
These are the main points on how to configure the image on your computer. Most often, when installing an operating system, average indicators are used. But, for more comfortable work, you need to twist them in one direction or another. By the way, the perception of the image can also depend on the time of day and on how the lighting falls on the screen. All this must be taken into account when selecting characteristics for yourself. Dealing with contrast is not difficult, although you will have to spend a little personal time.
And more useful articles about contrast:
Add a comment (possible with photo)
Currently you have JavaScript disabled. In order to post comments, please make sure JavaScript and Cookies are enabled, and reload the page. on how to enable JavaScript in your browser.
You can add your photo (jpg)
-

Do-it-yourself coffee maker repair - problems, we sort it out ourselves.
-

How to use a juicer, instructions and operating diagram.
-

What is the optimal and best screen resolution for watching LCD TV?
-

About TVs with ultra-high definition format UHDTV.
-

Where and how is it better to buy a refrigerator on credit (in installments) without overpayment?
IN computer graphics tone this is the level (hue) of color. A tone image has a continuous gray scale from white to black. For one color, the number of such gradations (steps) in color model RGB is 256 (8 bits).
Meaning tone correction photographic imaging consists of giving the photograph maximum dynamic range by adjusting the brightness and contrast of the image. To evaluate and correct the brightness and contrast of an image (its tone correction), the editor uses histograms.
New term
Histogram- a bar chart displaying the number of image pixels (vertically) that have a given brightness level (horizontally). In another formulation, a histogram is a graph that displays the distribution of image pixels by brightness. When constructing this graph, the X axis displays brightness values in the range from 0 (black) to 255 (white), and the Y axis displays the number of pixels with the corresponding brightness value.
For a computer graphics specialist, histogram analysis allows him to understand which tonal areas of the image need correction, and in which ones (Fig. 1.16).
When examining histograms in a light photographic image, the main pile of pixels is shifted to the right, in a dark one - to the left, and in a normal image it is located in the middle of the histogram.
In a bright image, all objects are brightly highlighted. An example of such images are photographs of brightly lit light objects. The shadow and midtone regions of such images usually contain little information and are of no interest.
In a dark image many important details hidden (lost) in shadow areas. Midtones and highlights are poorly highlighted. Such images are obtained when photographing in low light conditions.
Normal images are characterized highest quality, that is uniform distribution tones in all three areas: highlights, midtones and shadows.
So, histogram called a graph that displays the distribution of image pixels by brightness. The Histogram tool allows you to evaluate the dynamic range of an image, that is, the difference between its brightest and darkest areas (the spread between the minimum and maximum brightness of the image). In other words, with a histogram you can also determine which tonal areas are dominant: shadows (dark areas), highlights (light areas) or midtones. IN Adobe Photoshop checking the dynamic range of an image is performed with the command Image | Correction | Levels.
In Adobe Photoshop, the histogram correction tool is the Levels tool. Using Levels (by changing the brightness and contrast of the image), you can make the image lighter or darker, that is, improve its dynamic range. In other words, with the help of histograms you can evaluate the quality of the image, and with the help of levels you can improve this quality. To work with the histogram in levels there is a tool to set the black point, a tool to set the gray point and a tool to set the white point. According to the histogram, the tonal characteristics of an image can be classified into one of three types: light, dark or normal.
The white point is the brightest light point in the image. Accordingly, the black point is the point of the image with minimum brightness (the blackest). The gray dot is between white and black.
So, a set of three eyedroppers is designed to set the white point, black point and gamma values by specifying them directly on the edited image by selecting the appropriate eyedropper.
In addition to the eyedroppers that control the points, the levels have triangle sliders between the outer triangles, which characterize the value of the highlights and shadows of the image; there is a third triangle, which is designed to control the brightness in the area of the midtones of the image. This bitmap control has special name - gamma coefficient, and the actions performed by moving the middle triangle are called gamma adjustment. Setting the value of this parameter less than 1 (this value is set by default) darkens the image and, conversely, greater than 1 results in lightening the image in the midtone area. In both cases, the image contrast changes.
New term
Gamma- contrast ratio in the midtones of the image.
The parameters in the Output Levels section can be controlled in the same way as the input parameters. However, unlike them, here, moving the left triangle causes the darker pixels (shadows) to be brightened, and, conversely, moving the right triangle darkens the lighter pixels (highlights).
Clicking the Auto button is an alternative to executing the special Auto Levels command. It triggers an automatic tone correction procedure, the essence of which is to discard a predetermined number of the lightest and darkest pixels of the image.
The Channel list provides access to any color channel using a drop-down list. With it, you can adjust the input and output brightness values separately for each channel separately.
Note
The point of tone correction is to give the image maximum dynamic range, which in turn is directly related to adjusting the brightness of the image. However, not only histograms and levels are used to evaluate and correct the brightness and contrast of an image (its tone correction). Photoshop provides a wide range of similar tools, including the Curves, Brightness, and Contrast tools.
CurvesTo access this tool in Photoshop, use the Image | Correction | Curves or the corresponding key combination Ctrl+M. In principle, the Curves command is close to the Levels command, but here, instead of a histogram, a tool known as an adjustment curve in the form of a straight line with a slope of 45 degrees is used to adjust the brightness of the image. If the curve in the initial state is not changed, then all input (original) and output (edited) pixels have identical brightness values - Fig. 1.17.
Rice. 1.17.
Curve is a graph that converts the spectral range of the original image (input data) to the spectral range of the corrected image (output data).
While the Levels tool uses only three areas to adjust brightness (highlights, shadows, and midtones), the Curve tool allows you to change the contrast across many brightness ranges of an image at once. This is the main difference between these instruments, one of which is thinner and the other coarser.
By setting the slope of the curve to more than 45 degrees (a convex upward curve), you expand the range of tones or colors included in the corresponding areas of the image, making it more contrasty and lighter. On the contrary, setting a concave downward curve leads to a narrowing of the range of tones and, as a result, to a decrease in contrast and darkening of the image.
Advice
Use concave adjustment curves to correct underexposure (lack of shadow detail) and convex adjustment curves to correct overexposure (lack of highlight detail).
Most of the controls (eyedroppers and sliders) of the Curves dialog box are no different from the Levels dialog box discussed earlier. Therefore, it makes sense to focus only on new elements. This is a button for free drawing of curves (Draw to Modify the curve) with a pencil image. If in normal mode editing the shape of a curve is done by setting up to 16 points on the curve and then dragging them with the mouse, then using the Freehand tool you can draw any shape of the adjustment curve with the mouse. After finishing drawing, click on the Smooth button to smooth out the sharp corners of the curve.
Brightness/ContrastThe Brightness/Contrast command is used to simultaneously correct the brightness and contrast of an image, that is, not by separately adjusting each of the three tonal ranges (shadows, midtones and highlights), but by correcting the entire image at once. And although this tool does not have the flexibility and capabilities of the previously discussed Curves and Levels tools, it benefits from the simplicity and speed of its work.
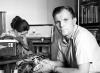
To explore the capabilities of the Brightness-Contrast dialog box, we’ll use concrete example. The image of a cat shown for this purpose in Fig. 1.18 has excessively high contrast and low brightness, and therefore poor detail in shadows and highlights. Let's try to correct these shortcomings.

Rice. 1.18.
To tone-correct such an image, run the command Image | Correction | Brightness/Contrast. This opens the Brightness/Contrast dialog box - fig. 1.19.

Rice. 1.19.
By moving the Brightness slider to the right (increasing the brightness), set its value to the optimal brightness value for your image. Move the Contrast slider to the left until optimal value in order to reduce image contrast. Evaluate the result in the active image window. If you are satisfied with it, click on the OK button (Fig. 1.20).

Rice. 1.20. Color correction and color balance
Color correction- changing the color parameters of pixels (brightness, contrast, hue, saturation) in order to achieve the optimal color of the image. In Photoshop, the following commands are used for color correction: and Hue/Saturation.
Color balance is the ratio of colors in an image. Adjusting the color balance allows you to strengthen or weaken one color at the expense of another additional (complementary) color. For example, red is complementary (opposite on the color wheel) to cyan, green to magenta, yellow to blue. The basis of color correction using the Color balance command is to reduce the amount of excess color component by enhancing its complementary color. An increase in red leads to a decrease in cyan and, conversely, a decrease in red increases the content in the image blue color. The Color balance tool is used to color correct the entire image, although you can also use it to correct selected areas of the image if necessary.
Hue/SaturationThese terms refer to the HSL color model, and therefore you can control the color characteristics of an image by adjusting the color components of this model: Hue, Saturation, and Lightness. The settings window is called by the command Image | Correction | Hue/Saturation or the key combination Ctrl+U (Fig. 1.21).

Rice. 1.21.
In this window:
- The Hue slider is moved along the perimeter of the color wheel in the range from -180 to 180 degrees. After installation specific meaning This parameter automatically shifts all image colors by specified value by adding it to the degree equivalent of each color;
- Moving the Saturation slider to the right allows you to change the value of this parameter from 0 (initial) to 100 percent (pure color without any gray component); moving to the left - from 0 to -100 degrees (the color disappears, turning into a shade of gray);
- The Lightness parameter is used to adjust the brightness of the image in the range from -100 percent (all colors turn to black) to 100 percent (colors fade to white);
- the upper and lower color bars serve as a preview window, displaying the original and modified spectrum of the image, respectively;
- The Edit list includes six complementary color channels and a composite channel (All). Selecting one of six base colors allows you to adjust the listed color parameters separately for each color range independently of the others, giving you the ability to fine-tune the entire image. Setting the Master option (All) is intended to apply the settings you have made simultaneously to the entire color range of the image;
- The Colorize checkbox is designed to implement one of two possible technologies: colorizing a black-and-white image with one of the color shades or recoloring a color image by converting the entire gamut of colors into a set of shades of the same color.
Don't confuse brightness visible image(projection) with the brightness of the light flux emanating towards the screen.
Projection brightness is the luminous flux scattered by the screen towards the viewer.
Image brightness can be assessed using the following reference indicators:
12-16 fL - for commercial cinema (THX standard)
40-45 fL – average brightness of a completely white field for an LCD panel
Metric units: Nit or Candela/m² = Lux x gain / p
1 Lux reflected from a Lambertian (reference reflective) surface is equal to 1 Nit
Imperial units: Foot Lambert = Foot Candles * gain / p
Conversion of FtL to Nit: x 3.43 i.e. 16 FtL equals 55 Nits
How to correctly calculate the expected brightness of an image?Exists simple formula, which allows you to calculate the expected brightness of the image.
Those. Projector brightness in ANSI lumens / screen area in square feet * screen reflectance = brightness in fL
In theory, lumens and foot-Lamberts are directly related. One foot-Lambert of luminosity is equal to one lumen per square foot. But, as usual, not everything is so straightforward. This formula does not take into account extraneous light and its direction, lamp wear or projector calibration (which can reduce the outgoing luminous flux by 40%). To avoid mistakes, you can either initially take only 70% of the projector brightness stated in the specification when calculating, or take indicators from 20 to 40 fL as an acceptable level.
Higher brightness will compensate negative impact extraneous light and raise the level of real contrast.
In principle, it is not recommended to get carried away with the “magic of numbers” in specifications. When specifying the brightness parameter in ANSI lumens, manufacturers do not indicate all measurement parameters. Many projectors have image optimization features that significantly affect the results. This means that a projector with a stated brightness of 700 ANSI may actually be brighter than a projector with a brightness rating of 1500 ANSI. So the specifications are pretty conditional source data for calculating expected indicators.
What types of projection screens are there?Projection screens are divided into different categories:
- By type of blade: with flexible blade and with rigid blade (plastic, glass)
- By projection type: front and rear projection screens
- By design: framed, collapsible and mobile
Inside, they are additionally divided into subtypes:
Frame screens: it’s difficult to name the groups, there are so many different types frames, the canvas can be attached to the frame with buttons, hooks and knitting needles, Velcro; in large diagonals, the canvas is almost always with eyelets.
Retractable: electrically operated and manually operated; with and without stretch marks; built into the ceiling and wall-ceiling.
Mobile: on a tripod, floor-mounted, on stands (including a type of screen called Fast-Fold, this trademark Da-lite, which has become in the field of screens almost the same as Xerox in copiers).
What is the advantage of rear projection?Rear projection screens provide more high quality pictures in strong light conditions (provided there is no light in the equipment room)
For what purposes are rigid screens used?Rigid screens are, as a rule, a rear projection, since such a screen, in addition to the screen functions itself, serves as a part of the wall, i.e. separates the control room from the viewing area, it should isolate viewers from noise. Basically it's large diagonals and, in fact, bright and noisy projectors.
There are also examples of installing hard rear projection screens in outdoor cinemas. The projector is hidden in the room, and a screen is inserted into the opening in the wall, which is not afraid of humidity.
Flexible vinyl rear projection sheets are noticeably cheaper and easier to transport, but they do not provide sound insulation.
What types of traditional screens (direct projection with flexible canvas) are there?It is necessary to separate the properties of the canvas (material) and the type of screen. The same screen model (frame, electric), etc. can be made with different fabrics.
The properties of the canvas are determined by the level of external illumination, content resolution (office canvases are not designed to work with high resolution), projector brightness.
If a film lover or organization chooses a screen, then they should consider separately what type of screen will be optimal for them and separately - the parameters of the canvas.
In the segment of cheap screens, the choice is small, usually Matte White (matte white) or High Contrast (slightly gray) canvas. In the higher segment, one screen model can have from three to twelve canvas options.
To what extent can the screen surface affect the image quality in different conditions? What proportion of the system cost should the screen make up?The properties of the screen surface can greatly affect image quality. In some cases, a correctly selected canvas in combination with a not the most expensive projector can ultimately produce a higher-quality picture than the most expensive projector with the “wrong” canvas.
Tying the cost of the screen to the cost of the projector is the wrong approach.
It’s like with sound: if we buy a more expensive source by saving on acoustics, we will get poor sound, since these are elements of the system. Similarly, in a combination of a projector and a screen.
What image parameters can be affected by the quality of the screen surface?The main image parameters that can be affected by the properties of the canvas are:
- brightness
- real contrast
- color rendering
- brightness uniformity across the field
- permission
Due to the reflectance coefficient (gain) of more than 1.0, the image becomes brighter (compared to the reference reflective surface). The human eye adjusts to the brightest (usually white) color, and as a result, a brighter image is perceived as having more contrast. But there is a limit: after a certain threshold, changes in brightness are no longer perceived. The photometer will see the picture differently; for it the perception curve is flat.
This physiological property perception has long been known to be used in painting, photography and, accordingly, applicable in cinema. Here good material on this topic.
How can the quality of the canvas affect the actual contrast?Real contrast is measured using the ANSI checkerboard method, in contrast to physiological perception, it is measured with a photometer. This takes into account the properties of the projector matrix (how “black” the black is), external illumination and the ability of the canvas to work with this illumination. If the base layer of the screen has a reflection coefficient below 1.0, and the optical coating increases it, then it turns out that in dark areas the canvas gives a darker “black”, and in light areas it increases brightness.
Also, canvases with a reflection coefficient of more than 1.0 have a directional dispersion pattern, i.e. light falling under sharp corners(background illumination) is scattered not towards the viewer, but at an equal angle of incidence, in the opposite direction.
How can the quality of the canvas affect color rendition?The “correct” canvas can work with the brightness of the image, i.e. with the whole range white light(here we remember that black, also known as gray, is a variety of white that differs only in brightness; it contains all the colors of the range), without affecting the color tone. A poor-quality canvas can change the tone of the image.
Screens with high reflectance can begin to work like a prism, splitting colors into components, and in different ways, depending on the angle of incidence. As a result, we get a color shift that is uneven across the screen area.
Some movie lovers are afraid to use a gray screen because they believe that they will not end up with a “white” color, i.e. its tone will change. In fact, if the screen good quality, it will only change the brightness of the projection and the contrast between areas of the image, but will not affect the color ratio in white light.
How can the quality of the canvas affect the uniformity of brightness?If you take a point source of light, which initially gives uniform illumination of the screen (some projectors initially have problems with uniform illumination of the entire screen area in terms of brightness), then the light will fall on the center of the screen and on its edges under different angles. The correct canvas with a reflection coefficient of 1.0 should give uniform brightness of diffused light over the entire area. If the reflection coefficient is more than 1.0, then the brightness should be within acceptable parameters (I don’t know exact numbers, and are there any standards on this matter, but it is clear that the smoother the brightness numbers at all points of the screen, the better).
How can canvas quality affect resolution?The projection surface of the screen is uneven, otherwise it would turn into a mirror; due to micro-irregularities, the effect of scattering the light falling on the screen is achieved; the less physical size pixels on the screen (4K), the more uniform these irregularities should be; if they are too large or uneven, some of the pixels will begin to reflect in an arbitrary direction and mix with each other, as a result we actually get a loss of resolution and problems with color rendering.
Why do high reflectance screens have a minimum projection distance limitation?The higher the reflection coefficient, the more indicator uneven image brightness across the entire screen field. This is due to the fact that the closer the projector is to the screen, the more different the angles of incidence of light in the center of the screen and on its edges are. An extreme manifestation of this situation is the “hot spot” effect, i.e. a very bright highlight in the center of the projection.
What is the “half luminance angle”?The viewing angle is directly related to the “half gain” (angle of half drop in brightness). This parameter is determined experimentally: using a photometer, the level of reflected light is measured at perpendicular location to the screen plane, then the photometer begins to shift along a radius tied to the geometric center of the screen. Where the amount of reflected light falls by 50% of the value obtained at the perpendicular, the angle of half-dip in brightness is designated.
The angle of half-dip in brightness determines the viewing cone (angle), i.e. Industry standards consider a 50% drop in brightness to be acceptable for viewing. It should be understood that when we shift along the radius, our “center of brightness” also shifts, i.e. one edge of the screen becomes brighter than the other (unless the screen diffuses the light exactly 180 degrees).
Knowing such a parameter as the angle of half fall of brightness, we know the viewing cone in which the viewer must be in order to see a high-quality image, i.e. the maximum width of the spectator row depending on the viewing distance.
The tangent of the angle of half fall in brightness, multiplied by the viewing distance, gives half the width of the spectator row.
As to why 50% is considered acceptable, there may be data on the ISF website, but I'm not sure. There are no state standards in this area, only industrial ones established by authoritative organizations ISF, THX, ANSI.
For what purposes are office screens with an aspect ratio of 1:1 used?None special features There are no such screens. The only thing that can be assumed is that they are taken as a “universal” format, i.e. not fully extended to get 4:3, 16:10, 16:9. It seems to me that this is a force of habit. Such screens are usually used in the low-cost segment.
One of the most important characteristics of a TV when choosing is the contrast value of the image on the TV screen. If you choose a TV based on picture quality, be sure to pay attention to the contrast value of different models.
By definition, contrast is the ratio of the brightness at the lightest point on the screen to the brightness at the darkest point on the screen. In other words, we divide the white level by the black level and get contrast. Only the values of these levels can only be obtained through a special test of the TV using specialized instruments. Therefore, the average user has to trust either the manufacturers or various reviews on sites where TVs are tested. Who to trust more and how to check the contrast, and we’ll talk further.
We said that the contrast is one of the most important characteristics TV. Therefore, manufacturers try to maximize this value to improve sales. The manufacturer can measure the brightness of a pixel in the laboratory when applying a signal that has never been real conditions not used. Then measure the brightness of this pixel in the absence of a signal, which is impossible during normal viewing. After this, the contrast value is calculated. And the values measured under such conditions are included in the product passport. Because of this, we see today that the contrast values of many TVs are simply off the charts. All this is possible because in the world there is no mandatory rules by measuring the contrast of displays.
high contrast


Separate static (natural) and dynamic contrast. Natural contrast depends only on the capabilities of the display, while dynamic contrast is obtained as a result of the use of additional technologies.
Static contrast is measured by the brightness of points in one scene (brightest and darkest). When measuring dynamic contrast, technologies are used to increase it. The TV itself, when playing a video, adjusts the contrast depending on the scene, which at the moment shown on the screen. That is, the backlight in the LCD matrix is adjusted. When showing a bright scene, the luminous flux from the backlight increases. And when the plot changes to dark (night, dark room etc.), then the backlight begins to reduce its luminous flux. It turns out that on bright scenes, due to the increase in light from the backlight, the black level is poor, and on dark scenes, the black level is good, but the luminous flux will decrease. This is hard for us to notice because in bright scenes even backlit black appears completely black. And in dark scenes, the brightness of light objects seems sufficient. This is a feature of human vision.
This backlight control scheme increases contrast, although not as much as the manufacturers claim. And indeed, many TVs with dynamic contrast have superior image quality to devices that do not have such an adjustment scheme.
But still, displays with high natural contrast will be valued higher. This can be demonstrated by displaying a picture of white text on a black background. On a screen with high static contrast, the text will actually be white and the background will be black. But a display with high dynamic contrast, if it shows a black background, then the letters will already be gray. Therefore, when playing regular video on a screen with increased natural contrast, the picture will be as close as possible to real image. For example, against the background evening sky there will be bright street lights. And against the backdrop of daylight bright sky a black car will really be black. This is the image we see in cinemas.
The image was as real as possible, in terms of contrast, on the screens of CRT televisions. But with the advent of the HDTV era, these television receivers gave up their place in the market to other devices. Today, high natural contrast values are achieved using LCOS home projectors. The first place among these devices is occupied by JVC devices with their version of D-ILA. Next we can mention Sony with SXRD technology. In third place you can already put plasma TVs.
Manufacturers of LCD TVs have introduced recent years several technologies to achieve the level of contrast that is possible in other models. Best results The use of LED backlighting with local dimming improves contrast. In this case, it is impossible to adjust the backlight of each pixel and each LED is not controlled individually, but the result is still good. But the producers abandoned the very effective type backlight, when LEDs are located over the entire screen area. Such production turned out to be expensive. Today, so-called side lighting is mainly used. Here the LEDs are located at the top and bottom. Local dimming schemes have also been developed for side lighting. TVs with such backlighting show enough good results by contrast value.
When choosing a TV in a store, it is difficult to evaluate the quality of the display contrast. External bright lighting interferes; screens can have different coatings: anti-glare or glossy. The passport does not always contain the true contrast value, because manufacturers measure it in laboratories and by applying special signals to the screen. Even after reading several reviews on the Internet, it is not always clear what the real contrast value is. After all, everyone measures it in their own way.
There are several techniques for measuring contrast. First, a black field is fed to the input and the brightness is measured, and then a white field is applied and the brightness is measured. The result is good contrast, but during actual viewing there will never be a completely white or completely black picture. At the same time, when displaying a regular video signal on the TV, video processing is turned on, which also makes its own changes. More accurate readings are given by the ANSI test, when a checkerboard field with white and black fields is shown on the screen. This is more consistent with the normal image. But in this case, the white fields will affect the measurement of the brightness value of the black fields. So one correct method There is no contrast measurement.
So the recommendations for choosing a TV with good contrast remain the same. If you mostly watch movies in a darkened room, then plasma is best. In a lit room, an LCD TV with LED backlight will show good results due to its high brightness. Between these models you can put an LCD TV if there is a reserve in light output. And the main thing you need to remember is that any TV needs to be properly configured. Adjust the brightness and contrast of the device correctly to obtain the highest quality image.
Additionally:
Excel for Office 365 Word for Office 365 Outlook for Office 365 PowerPoint for Office 365 Excel 2019 Word 2019 Outlook 2019 PowerPoint 2019 Project Professional 2019 Excel 2016 Word 2016 Outlook 2016 PowerPoint 2016 Project Professional 2016 Excel 2013 Word 2013 Outlook 2013 PowerPoint 2013 Excel 2 010 Word 2010 Outlook 2010 PowerPoint 2010 Excel 2007 Word 2007 Outlook 2007 PowerPoint 2007 Project Online Desktop Client Project Professional 2013 Project Standard 2013 Project Standard 2016 Project Standard 2019 Less
Changing screen brightnessDo you want to adjust the brightness screen ?
Windows 10: Click the Start button, select Settings, and then select System. In the Brightness and Color section, set the Change Brightness slider to adjust the brightness. More information see the article changing screen brightness
Windows 8: Press the Windows key + C. Select Settings, and then Change PC settings. Select Computer and Devices > Display. Enable automatic screen brightness adjustment. For more information, see Adjust brightness and contrast
Learn more about adjusting pictures in Office applications.
This video demonstrates several ways to customize your design.
(While the video is playing, you can click the resize arrow in the lower right corner of the frame to make the image larger.)

Duration: 1:35
Adjust brightness, clarity, or contrast
Note: even if you have made corrections. This feature is not available in Word or Excel.
Change the Office color scheme to improve contrastIs the Office color scheme too bright? Do you need more contrast in Office applications? For more information, see Change the Office theme (office 2016 and 2013).
You can change the brightness, contrast, or sharpness of an image using the correction tools.
Clockwise from left top corner: Original pattern, pattern with increased smoothness, increased contrast, and increased brightness.


Tip: If you use PowerPoint, you can still keep the original version of the picture even if you change the brightness of the picture. This feature is not available in Word or Excel.