Hello blog readers .
Today is May 27 – All-Russian Library Day.
Library day in my Russia!
The library is famous everywhere -
Source of joy, spiritual strength,
An assistant in life and creative work.
I tell people on the road, at the dacha:
Like, it's a holiday!
Sadness casting off its shadow,
They answer me:
“Why be weird?
We have a library day – every day.”
Well, let it be like this always and forever.
Let it go from childhood to old age
For knowledge in our library world
Friendly reading people!
O. Kolganova
Happy Librarian's Day!
Yesterday my friend called and asked: “Do you know how to enlarge the font?” Of course, I know how to increase the font in Word, but only to the standard 72 pt, but what if you need 100 pt or 200 pt?
In this article I will tell you:
1. How to increase the font size in Word?
2. How to find the Ruler in Word?
It turned out that increasing the font to 100 pt or 200 pt is simple, I know two ways.
1 way:
Do you know how to change the font size on a tab? Home, you need to select the desired number, usually it is 14 pt.


Please note in the figure 14 pt is highlighted in blue, so to increase it beyond 72 pt, you need to set the desired size in the selected window, for example, 100 pt. And press Enter and that’s it!


Method 2:
Click the right mouse button. A window opens:

Select the Font in it.

Where the size we write the number 100.
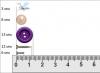
For information on how points (pt) and millimeters (mm) are related in a font


Where is the Ruler hidden in Word?
Ruler in Word
So, you found out:
1. How to increase the font size in Word
2. How to find a Ruler in Word
I hope the information was useful to you.
IF YES, SAY THANK YOU, CLICK THE ICON
Probably every user has dealt with Microsoft Office software or at least heard about it. Moreover, for the majority, most likely, this was experience with MS Word. This is the most versatile application for working with text and editing it. But, like any other program, some people may have questions due to misunderstanding of the functions. In particular, how can I make the font larger than 72 in Word? Focusing specifically on this issue, it is worth noting that enlarging the text above the specified parameters will not be difficult.
Home Tab
Setting the text, its and many other functions, is located on the tab that opens by default. "Home" contains information about the main elements of the text, most often used by users. Here you can find a variety of functions for formatting fonts - from text style, to subscripts and coloring characters in a different color. To be more specific, the following sections are located here:
- Clipboard. Allows you to perform operations of inserting and formatting text.
- Font. Working with writing characters - the user can modify the written text in size, color, etc.
- Paragraph. Provides editing of paragraph elements such as indents, wrap, list, fill and others.
- Styles. Here you can get creative with the format of the text, using ready-made styles or creating a new look.
- Editing. This panel contains tools such as “Find”, “Select”, “Replace” and some others.
Font section

Let's take a closer look at the "Font" section, since this is where key operations occur when creating beautiful text. Returning to the question of how to make the font larger than 72 in Word, let's start directly with this tool. Opposite the font selection there is a field with letter size values. By clicking on the arrow, you will expand the list where you can see values from 1 to 72. But is it really impossible to set a size parameter larger than 72? You can - the text editor supports dimensions from 1 to 1638, so only these dimensions are available to the user. To enter a number greater than 72, you must specify a specific size in the field itself. You can control the size using the "Increase - decrease font size" buttons with a stroke difference of 2 units.
Hotkeys
When writing text quickly, it is convenient to use keyboard shortcuts, which greatly reduces time. There are two keyboard shortcuts for resizing:
- "Ctrl+]" - increases the size by one unit.
- "Ctrl+[" - decreases the size by one unit
With Word and Publisher, you can print poster letters and resize them from 1 to 1638.
For beginners, the difficulty is that it is not clear how to make the letters larger if the standard sizes are limited to font size 72.
This article discusses the issue of increasing the standard font size, as well as the question of how to create a WordArt title.
How to print capital letters
1. Set the scale smaller because we need to see the sheets and the letters on them in order to edit the inscription.
1.1. In Word 2010, in the status bar we find the scale tool.
Use the slider or click the minus button to reduce the sheet size.

tool - scale
(Figure 1)
1.2. In Word 2003, the scale can be set in two ways - by selecting the desired one in the toolbar.
![]()
(Figure 2)
The second way is to click "View" / "Scale" ![]()
(Figure 3)
![]()
(Figure 4)
After we have chosen the scale, we can see several sheets at once and how the inscription will look.
2. Change the size of the letters.
If you don't know how to increase the letter size (more than 72pt), then it's quite simple.
We erase what is written in the “Font Size” window:
— place the cursor inside the “Font Size” window;
— delete the number indicating the old size using the backspace or delete key;
— print the new font size, remembering that the upper limit is the number 1938 and if you type 1939, the program will report an error.
2.1. In word 2010, go to the “Home” tab, erase the old font size and type 72, and then press Enter.

(Figure 5)
2.2. In word 3003 you also need to erase the font.
![]()
(Figure 6)
Here's what I got.

(Figure 7)
Working with WordArt
This feature is not available in Word 2010, but is present in Publisher, where the inscription can be printed and copied into Word.
3. To make WordArt text, turn on the drawing panel in Word 2003; to do this, click “View” / “Toolbar” / “Drawing”. Now click on the letter A in the WordArt panel and select a font for the ad text.
![]()
(Figure 8)
And now you can write the text in full or in parts...
![]()
(Figure 9)
4. After we have received part of the text, we need to move it, move it, but it won’t work that easily - we will have to change the settings of the WordArt object. To do this, select the text, right-click on the selected object and select “Format WordArt Object” in the window that appears.
![]()
(Figure 10)
5. Then in the window that appears, we must go to the “Position” tab and select “By contour”, now we can freely move and enlarge our object.
![]()
Go to the Position tab and select Along contour
(Figure 11)
Conclusion
If you are going to print an inscription for a poster in Word, then this can be done using regular text enlarged in size and WordArt text.
Moreover, the new program does not always have the best capabilities and the outdated word program can print in the same way, you just need to know the location of the tools.
Good luck with your poster.
Those who have used the MS Word word processor at least a couple of times in their lives probably know where in this program you can change the font size. This is a small window in the “Home” tab, located in the “Font” tool group. The drop-down list in this window provides a list of standard values from smallest to largest - choose any.
The problem is that not all users know how to increase the font in Word beyond the default 72 units, or how to make it smaller than the standard 8, or how to set any arbitrary value. In fact, this is quite simple to do, which we will discuss below.
1. Select the text whose size you want to make larger than the standard 72 units using the mouse.

Note: If you are just planning to enter text, just click where you want it to be.
2. On the quick access panel in the tab "Home" in the tools group "Font", in the window located next to the name of the font, where its numerical value is indicated, click with the mouse.

3. Highlight a preset value and delete it by pressing "BackSpace" or "Delete".

4. Enter the desired font size and click "ENTER", not forgetting that the text still has to somehow fit on the page.
5. The font size will be changed according to the values you specified.

In exactly the same way, you can change the font size downward, that is, less than the standard 8. In addition, you can similarly set arbitrary values other than the standard steps.
Changing font size step by step
It is not always possible to immediately understand what exact font size is needed. If you don’t know this either, you can try changing the font size step by step.
1. Select a piece of text whose size you want to resize.

2. In the tools group "Font"(tab "Home") press the button with a capital letter A(to the right of the size window) to increase the size or a button with a smaller letter A to reduce it.

3. The font size will change with each click of the button.

Note: Using the buttons to change the font size step by step allows you to increase or decrease the font only by standard values (steps), but not in order. And yet, in this way you can make the size larger than the standard 72 or smaller than 8 units.
You can learn more about what else you can do with fonts in Word and how to change them in our article.
As you can see, increasing or decreasing the font in Word above or below the standard values is quite simple. We wish you success in further mastering all the intricacies of this program.
When working with text documents in the Word editor, small font sizes are usually used. Therefore, when the need arises to make a really large font, most users encounter difficulties. They simply don’t know how to make a font larger than 72 in Word. If you are also faced with a similar problem, then this material should help you.
Making a large font using a drop-down list
If you need to make a large font in Word 2010, 2007, 2013 or 2016, the easiest way to do this is to use the Font Size drop-down list, which is available on the Home tab. This list is located in the upper left part of the program window, next to the list of available fonts. The screenshot below shows how it looks in the Word 2010 text editor.
By default, font sizes from 8 to 72 are available in the list. If one of the standard sizes suits you, you can simply select it from the list. If you need a font size larger than 72, then this is also no problem. Simply select the current font size value with the mouse and enter any other value using the keyboard. For example, you can enter the number 100 and get a font size of 100 points.

If you use Word 2003, then everything is about the same. The toolbar has a drop-down menu with a list of font sizes. Here you can select one of the standard sizes, or you can enter the desired font size using the keyboard.

Fonts larger than 72 are also perfectly supported in Word 2003.
Making a larger font using the “Increase font size” button
In addition, new versions of Word (for example, Word 2007, 2010, 2013 and 2016) have another tool for changing the font size. These are the “Increase size” and “Decrease size” buttons, which are located to the right of the drop-down list with font sizes.
These buttons allow you to increase or decrease the font size by one step according to the list of sizes. That is, if you currently have 14 font installed, then after clicking on the “Increase size” button you will get 16 font (the next value in the list of font sizes).

After font size 72, the increase occurs by 10 points (80, 90, 100, 110, etc.).
Making a large font using the Font window
You can also make a large font using the Font window, which is opened using the keyboard shortcuts CTRL+D or CTRL-SHIFT-P. This window contains all the settings related to fonts. Among other things, there is also the font size.

In order to make a font with a size greater than 72, you need to enter your value in the “Size” field and save the settings using the “Ok” button.