Taip pat įtrauksime įrašų redagavimo funkciją Tinkinti laukai (priskirti arba pasirinktiniai laukai) kiekvienam tipui ir rodyti laukus naujuose šablonuose.
„WordPress“ tinkinti įrašų tipai leidžia visiškai valdyti, kaip rodyti turinį savo vartotojams. Jei kuriate įrašus savo tinklaraštyje, galite kurti pasirinktiniai stiliai tik jiems. Jei rašote atsiliepimus apie muziką ar filmus, prie norimų įrašų galite pridėti papildomų įvesties sričių ir jos nebus rodomos kituose tinklaraščio įrašuose.
Tačiau prieš tęsdami supraskime, kas yra vartotojų įrašai.
Kas yra „WordPress“ tinkinti įrašų tipai?
Trumpai tariant, pasirinktiniai „WordPress“ įrašų tipai leidžia rūšiuoti įrašus pagal jų turinį. „WordPress“ numatytieji įrašų tipai yra „Post“, „Page“, „Media“ ir kt.
Paprastai visus savo įrašus rašote administratoriaus pulto skiltyje Pranešimai, tada priskiriate jiems kategoriją. Visi įrašai įvairių tipų yra tame pačiame sąraše, todėl sunku juos atskirti pagal turinio tipą.
Priskirti įrašų tipai su savo nuorodomis administratoriaus pulte nukreipia jus į tokio tipo įrašų sąrašą. Taip sukurtiems įrašams galima priskirti kategorijas kaip įprastam įrašui, todėl turite visišką laisvę rūšiuoti ir pateikti įrašus bet kokiu būdu.
Anksčiau pateiktame pavyzdyje, jei vartotojas apsilanko jūsų svetainės filmų duomenų bazės skyriuje, apžvalgų įrašai nebus įtraukti. Pavyzdžiui, jei nustatysite kategorijas „Veiksmas“ ir „Romantika“, naudotojai galės pereiti į veiksmo filmų kategoriją ir pamatyti visas šios kategorijos apžvalgas ir filmus.
Kai kuriate naujo tipo publikaciją, turite daug nustatymų, pavyzdžiui: kur administratoriaus meniu bus nuoroda, ar šis tipas bus įtrauktas į paieškos rezultatus, ar bus palaikomas teksto fragmento rodymas, ar leidžiama komentuoti ir pan.
Galite keisti įvairius pavadinimo tekstus (apibrėžtus naudojant masyvą $etiketės), pvz., pervardyti Pridėti naują įrašą V Pridėti naują filmą. Pavyzdžiui, galite pervardyti tekstą Teminis vaizdas V Pridėti plakatą.
Taip pat galite įgalinti priskirtų laukų funkciją savo įrašų rengyklėje, kuri pagal numatytuosius nustatymus yra paslėpta ir turi būti įjungta naudojant nuorodą Ekrano parinktys redaktoriaus viršuje.
Tęsiant filmų ir filmų apžvalgų pavyzdį, filmų leidiniuose galima pridėti pasirinktinius / tinkintus laukus tokiems parametrams kaip išleidimo metai, režisierius, reitingai ir daugelis kitų. trumpa apžvalga filmus kaip įrašymo turinį.

Paprastai bet kuris jūsų sukurtas laukas yra prieinamas bet kokio tipo įrašu, todėl įskiepis reikalauja apribojimų kiekvienam laukui, kuriame jis gali būti pasiekiamas.
Naujų pranešimų tipų kūrimas
Kai kuriate reikšmingus „WordPress“ pakeitimus, viena iš galimų diegimo parinkčių yra sukurti papildinį. Taip pat faile galite sukurti naujų tinkintų įrašų tipų funkcijos.php. Šiam vadovui mes Sukurkime papildinį ir toliau naudokime pavyzdį su filmų/recenzijų duomenų baze.
Norėdami sukurti pasirinktinį įrašo tipą, turite parašyti keletą funkcijų, kurios iškviečia „WordPress“ funkciją register_post_type() su dviem parametrais. Jūsų funkcija turėtų būti pririštas prie veiksmo kabliuko init, kitu atveju pasirinktinis pašto tipas nebus tinkamai užregistruotas.
// Pasirinktinė funkcija PRIVALO būti prijungta prie init action hook add_action("init", "lc_register_movie_post_type"); // Pasirinktinė funkcija, kuri iškviečia funkciją register_post_type funkcija lc_register_movie_post_type() ( // Nustatykite įvairias teksto dalis, $labels naudojamas $args masyve $labels = array("name" => _x("Filmai", "įrašo tipas generalinis name"), "singular_name" => _x("Movie", "post type type name"), ...); // Nustatykite įvairią informaciją apie įrašo tipą $args = array("labels" => $ etiketės, "description" => "Mano priskirtas įrašo tipas", "public" => true, ... // Užregistruokite filmo įrašo tipą su visa informacija, esančia $arguments masyve register_post_type("movie", $); args);
Visos pasirinktinės funkcijos turi būti su priešdėliu, kad būtų išvengta konfliktų su kitais papildiniais ar temos funkcijomis. Čia bus naudojamas priešdėlis LC.
Du funkcijos parametrai register_post_type() Tai:
- Įrašo tipo pavadinimas, daugiausia 20 simbolių, jame neturi būti tarpų ar didžiųjų raidžių
- Asociatyvinis masyvas vadinamas $args, kuriame yra informacija apie įrašo tipą raktų ir reikšmių porų pavidalu 'raktas' => 'vertė'
Masyvas $args
Dažniausiai naudojami masyvo klavišai $args parodyta žemiau, visi yra neprivalomi:
- etiketės– masyvas masyvas, kuriame nurodomos skirtingos teksto dalys, pvz., „Pridėti naują įrašą“ galima pervadinti į „Pridėti naujas filmas“. Etikečių masyvo klavišai aprašyti toliau su paaiškinimais;
- aprašymas– trumpas ir glaustas įrašo tipo aprašymas, jis gali būti rodomas tipo šablonuose, bet niekur kitur nenaudojamas;
- viešas– ar įrašo tipas matomas autoriui ir lankytojams, numatytoji reikšmė yra FALSE, vadinasi, ji nerodoma net administratoriaus pulte;
- neįtraukti_iš_paieškos– ar tokio tipo įrašai bus rodomi įprastuose paieškos rezultatuose, numatytoji reikšmė priešinga prasmė viešas;
- viešai_klausoma– ar tokio tipo įrašus galima gauti naudojant URL, pvz., http://www.mywebsite.com/?post_type=movie, arba išplėstiniam naudojimui naudojant funkciją query_posts(). Numatytoji reikšmė yra vieša;
- show_ui– ar administratoriaus valdymo skydelyje yra prijungtos meniu nuorodos ir pranešimų rengyklė. Numatytoji reikšmė yra vieša;
- rodyti_navigacijos_meniu– ar tokio tipo įrašai bus įtraukti į puslapyje sukurtą naršymo meniu Išvaizda->Meniu, numatytoji reikšmė yra vieša;
- Rodyti_meniu– ar įrašo tipo nuoroda rodoma administratoriaus pulto naršymo lange. FALSE – paslepia nuorodą. TRUE – prideda nuorodą kaip naują aukščiausio lygio nuorodą. Įvesdami eilutę galite įdėti nuorodą į esamą aukščiausio lygio nuorodą, ty įvesti parametrus Options-general.php patalpina jį po nuoroda „Nustatymai“.
- rodyti_admin_baroje– ar tokio tipo įrašai bus rodomi virš administratoriaus juostos, po nuoroda + Naujas
- meniu_pozicija– padėtis nauja nuoroda administratoriaus konsolės naršymo meniu, 5 yra po Įrašai, 100 yra po Nustatymai, visą pozicijų sąrašą galite rasti WordPress Codex
- hierarchinis– ar įrašą galima priskirti pirminiam įrašui, jei reikšmė TRUE, tada masyvui $ palaiko turi būti parametras „page-attributes“.
- palaiko– pasirinktinai įgalina įrašų funkcijas, tokias kaip: vaizdai, teksto fragmentai, pasirinktiniai laukai ir kt. Jei nustatyta į FALSE, tada vietoj masyvo išjungiama tokio tipo įrašų rengyklė – naudinga, jei norite uždaryti visus šio įrašo įrašus įveskite iš redagavimo, bet palikite juos matomus (masyvo verčių sąrašas reikalingas)
- taksonomijos– masyvas taksonomijų, kurias galima pritaikyti tokio tipo leidiniams, taksonomijos turi būti jau užregistruotos – jos kuriamos ne iš čia!
- turi_archyvą– ar tokio tipo įrašuose bus archyvo puslapiai, URL turi nuolatinės nuorodos struktūrą, o aprašomoji URL dalis yra 1 funkcijos register_post_types() parametras, ty bus rodoma http://www.mywebsite.com/movie_reviews/ visi filmų_apžvalgų įrašai.
- query_var– TRUE arba FALSE nustato, ar įrašas gali būti rodomas užklausus URL su įrašo tipu ir pavadinimu, t. y. „http://www.mywebsite.com/? filmas=matrica‘. Jei įvesite teksto eilutę, tekstą turite įdėti po simbolio, todėl „filmas“ atrodys kaip „? filmas=matrica‘.
Etikečių masyvai
Pirmasis masyvo raktas $args paskambino etiketės ir turi būti masyvas. Jame nurodomos įvairios teksto dalys, susijusios su įrašo tipu. Kadangi čia gali būti daug duomenų, geriausia sukurti masyvą, vadinamą $etiketės jų saugojimui. Aukščiau pateiktas kodas šiek tiek paaiškina, ką tai reiškia.
Toliau pateikiami keli svarbūs etikečių masyvo klavišai. Visi jie yra neprivalomi:
- pavadinimas – bendriniai vardai pranešimo tipui, pavyzdžiui, filmams
- vienaskaitos_vardas– vieno tokio tipo įrašo pavadinimas, pavyzdžiui, filmas (filmas)
- pridėti_naujas– teksto „Pridėti naują“ pakeitimas nurodytu tekstu, pavyzdžiui, „Pridėti filmą“
- pridėti_naujas_elementas– „Pridėti naują įrašą“ pakeisti, pavyzdžiui, „Pridėti naują filmą“
- redaguoti_elementą– „Redaguoti įrašą“ pakeisti, pavyzdžiui, „Redaguoti filmą“
- rodomas_vaizdas– „Panašus vaizdas“ įrašų rengyklėje pakeistas, pavyzdžiui, „Filmo plakatas“
- set_featured_image– pavyzdžiui, „Nustatyti siūlomą vaizdą“ pakeisti šia parinktimi „Pridėti filmo plakatą“
- meniu_pavadinimas– nuorodos teksto keitimas į viršutinis lygis, numatytasis nuorodos teksto rakto pavadinimas
Masyvo palaiko
// Įgalinti konkrečias funkcijas įrašų rengyklėje mano įrašo tipui $supports = array ("pavadinimas", "redaktorius", "autorius", "miniatiūra"); // Išjungti VISAS mano įrašo tipo įrašų rengyklės funkcijas $supports = FALSE;Vienas iš masyvo raktų $args paskambino palaiko. Tai paprastas masyvas, kuriame įrašote įrašų rengyklės funkcijų, kurias norite įjungti savo įrašo tipui, sąrašą. Pagal numatytuosius nustatymus įjungtas tik pavadinimas ir redaktorius.
Taip pat galite nustatyti FALSE vietoj masyvo, kad išjungtumėte visas redaktoriaus funkcijas, išjungdami pavadinimą ir turinio pridėjimo sritį. Tai reiškia, kad įrašo negalima redaguoti, bet jis vis tiek yra visiškai matomas.
Čia yra funkcijų, kurias galite įtraukti į masyvą, sąrašas $ palaiko:
- titulą
- redaktorius
- autorius – PASTABA: tai leidžia pakeisti įrašo autorių
- miniatiūra (piktograma)
- ištrauka (teksto fragmentas)
- trackbacks
- pasirinktiniai laukai (priskirtas laukas)
- komentarus
- pataisymai (versijos)
- puslapio atributai
- pašto formatai (post formatai)
Pasirinkto „WordPress“ įrašo tipo sukūrimas naudojant papildinį
Dabar, kai žinome, kokių parametrų reikia funkcijai, galime sukurti savo įskiepį, rašyti savo funkciją ir pridėkite jį prie įvykio init.
lc_custom_post_movie()į pradinį veiksmų kabliuką add_action("init", "lc_custom_post_movie"); // Pasirinktinė funkcija registruoti filmo įrašo tipo funkciją lc_custom_post_movie() ( // Nustatykite etiketes, šis kintamasis naudojamas $args masyve $labels = array("name" => __("Movies"), "singular_name " => __("Filmas"), "add_new" => __("Pridėti naują filmą"), "add_new_item" => __("Pridėti naują filmą"), "edit_item" => __("Redaguoti filmą") , "new_item" => __("Naujas filmas"), "all_items" => __("Visi filmai"), "view_item" => __("Žiūrėti filmą"), "search_items" => __("Ieškoti filmų" "), "featured_image" => "Plakatas", "set_featured_image" => "Pridėti plakatą"); // Mūsų įrašo tipo argumentai, kuriuos reikia įvesti kaip registr_post_type() 2 parametrą $args = array("labels" => $labels, "description" => "Saugo mūsų filmų ir filmų duomenis", "public" => true, "menu_position" => 5, "supports" => array("title", "redaktorius", " miniatiūra", "ištrauka", "komentarai", "pasirinktiniai laukai"), "has_archive" => true, "show_in_admin_bar" => true, "show_in_nav_menus" => true, "has_archive" => true, "query_var" = > "film"); // Iškvieskite tikrąją WordPress funkciją // 1 parametras yra įrašo tipo pavadinimas // 2 parametras yra $args masyvas register_post_type("movie", $args); ) //Kablys lc_custom_post_movie_reviews()į pradinį veiksmų kabliuką add_action("init", "lc_custom_post_movie_reviews"); // Pasirinktinė funkcija registruoti filmo peržiūros įrašo tipo funkciją lc_custom_post_movie_reviews() ( // Nustatykite etiketes, šis kintamasis naudojamas $args masyve $labels = array("name" => __("Filmų apžvalgos"), "singular_name" => __("Filmo apžvalga"), "add_new" => __("Pridėti naują filmo apžvalgą"), "add_new_item" => __("Pridėti naują filmo apžvalgą"), "edit_item" => __( "Redaguoti filmo apžvalgą"), "new_item" => __("Naujo filmo apžvalga"), "all_items" => __("Visų filmų apžvalgos"), "view_item" => __("Žiūrėti filmų apžvalgas"), " search_items" => __("Ieškoti filmų apžvalgų")); // Mūsų įrašo tipo argumentai, kurie turi būti įvesti kaip register_post_type() 2 parametras $args = array("labels" => $labels, "description" = > "Turi mūsų filmų apžvalgas", "public" => tiesa, "menu_pozicija" => 6, "palaiko" => array("pavadinimas", "redaktorius", "miniatiūra", "ištrauka", "komentarai", " custom-fields"), "has_archive" => true, "show_in_admin_bar" => true, "show_in_nav_menus" => true, "has_archive" => true); // Iškvieskite tikrąją WordPress funkciją // 1 parametras yra pavadinimas post type // $args masyvas patenka į 2 parametrą. register_post_type("review", $args); )
Jei įgalinsite šį papildinį, administratoriaus pulto naršymo juostoje, iškart po pranešimais, pamatysite naują nuorodą.
Užvedus pelę bus rodomi meniu punktai 'View All' ir 'Add New', tekstas atitiks tai, kas nurodyta masyve $etiketės. Pažiūrėkite į redaktorių, kur pasikeitė nuorodos.
Apriboti tam tikrų įrašų pasirinktinius laukus
Kai pridedate laukus prie įrašo, laukai išsaugomi ir galite greitai pridėti juos prie naujo įrašo. Pridėti pasirinktiniai laukai bus rodomi kiekvieno įrašo išskleidžiamajame sąraše. Dėl to tam tikrų tipų įrašuose gali būti sunku rasti ieškomą lauką. Jei norite apriboti pasirinktinius laukus, kad jie būtų pasiekiami tik tam tikrų tipų įrašams, paprasčiausias būdas yra naudoti papildinį.
get_post_meta()
- užima 3 parametrus ir grįžta rezultatas
- pirmasis parametras yra įrašo ID, jį galite naudoti čia $post->ID norėdami gauti šiuo metu rodomo įrašo ID
- antrasis parametras – pasirinktinio įrašo lauko pavadinimas, skiriamos didžiosios ir mažosios raidės
- trečiasis parametras yra loginio tipo, vadinamas $vienišas ir gali būti TRUE (pateikia rezultatą kaip eilutę) arba FALSE (pateikia masyvą).
ID, "Box Art", TRUE); if (!empty($movie_box_art)) ( ?>PASTABA: Galite sukurti kelis tinkintus laukus tuo pačiu pavadinimu ir skirtingomis reikšmėmis. Jei yra keli laukai tuo pačiu pavadinimu, nustačius FALSE bus pateiktas jų masyvas.
 " alt=" !}">
Nuo funkcijos get_post_meta() grąžina reikšmę, galite naudoti reikšmę sąlyginėje išraiškoje, kad atitinkamai pakeistumėte išvaizdą.
Aukščiau pateiktame pavyzdyje patikriname, ar filme yra dėžutės paveikslėlis, priskirtas kaip pasirinktinis laukas. Jeigu $movie_box_art ne tuščias, rodyti div ir vaizdą.
Rodyti išplėstinius pasirinktinius laukus
// Rodyti lauko reikšmę the_field("LAUKO PAVADINIMAS"); // Grąžina lauko reikšmę get_field("LAUKO PAVADINIMAS");Papildinys Advanced Custom Fields siūlo savo funkcijas ir trumpuosius kodus laukams rodyti.

the_field('LAUKO PAVADINIMAS');
Rodo nurodyto lauko reikšmę, turite naudoti lauko pavadinimą, kurį nurodėte kurdami laukų grupę.
get_field('LAUKO PAVADINIMAS');
Grąžina nurodyto lauko vertę, naudingą sąlyginėms išraiškoms.
Tai yra funkcijos, kurių jums greičiausiai prireiks. Yra daug papildomų funkcijų ir jas galite rasti .
Trumpieji kodai
Galite rodyti laukus tiesiai ant įrašo naudodami aukščiau pateiktą trumpąjį kodą.
Pagrindiniame puslapyje rodyti tinkintą įrašo tipą
// Prijunkite mūsų pasirinktinę funkciją prie veiksmo pre_get_posts hook add_action("pre_get_posts", "add_reviews_to_frontpage"); // Pakeiskite pagrindinę užklausos funkciją add_reviews_to_frontpage($query) ( if (is_home() && $query->is_main_query()) ( $query->set("post_type", array("post", "movie", "review" ")); ) grąžinti $query;)Priskirti pranešimų tipai pagal numatytuosius nustatymus nerodomi pagrindiniame puslapyje, todėl turite sukurti naują funkciją, kuri iškviečia objekto nustatymo metodą WP_Užklausa WordPress.
Funkcija patikrina, ar lankytojas yra pagrindiniame puslapyje ir ar aktyvi užklausa yra pagrindinė „WordPress“ sugeneruota užklausa.
$query->set() reikia dviejų parametrų:
- pirmasis parametras yra prioritetas, kurį norite pakeisti, mūsų atveju mes keičiame prioritetą post_type
- antrasis parametras yra masyvas, kurį norite perduoti kaip atributo reikšmę post_type
Aukščiau pateiktame kodo pavyzdyje masyvas prasideda „post“ – todėl kiekvienas „WordPress“ įrašas yra „post“ tipo ir mes vis tiek norime jį įtraukti į pagrindinį puslapį.
Jei pagrindiniame puslapyje norite naudoti tik tam tikro tipo tinkintus įrašus, galite pašalinti „įrašus“ ir naudoti savo įrašo tipą.
Įvesta reikšmė turi atitikti 1 funkcijos parametrą register_post_type().
Išvada
Šioje pamokoje parodome, kaip sukurti pasirinktinius tipus ir kokius duomenis reikia turėti. Pasirinktinių įrašų tipų lankstumas suteikia vertingų funkcijų bet kuriai „WordPress“ svetainei.
„WordPress“ yra susijęs su tinkinimu / tinkinimu. Jis buvo sukurtas taip, kad būtų galima pritaikyti absoliučiai kiekvieną skyrių. Šioje pamokoje mes apžvelgsime pasirinktiniai įrašų tipai, viena reikšmingiausių ir ryškiausių „WordPress“ savybių, kurios pagalba „WordPress“ sugebėjo pasiekti naujų aukštumų.
Kokie yra pasirinktinių įrašų tipai?
Tarkime, kad norite, kad jūsų tinklaraštyje būtų atskira filmų apžvalgų skiltis. Naudodami pasirinktinius įrašų tipus galite sukurti naują tipą, pvz., Įrašai ir puslapiai, kuriuose bus kitokio tipo duomenys. Ji turės savo administratoriaus meniu, specialius puslapius redagavimui, savo taksonomijas ir daugybę kitų įrankių, reikalingų visapusiškam darbui su leidiniais.
Priskirti įrašų tipai yra papildomas administratoriaus nustatymų rinkinys, egzistuojantis kartu su numatytųjų įrašų tipų nustatymais, pvz., įrašų, puslapių, prisegtus failus ir kt. Pasirinktiniai įrašų tipai gali saugoti bet kokio tipo duomenis. Jie turi atskirą redaktorių, medijos įkėlimo programą ir naudoja jau esamą „WordPress“ lentelės struktūrą, todėl duomenų valdymas yra paprastas. Pagrindinis tinkintų įrašų tipų, sukurtų naudojant WordPress API, pranašumas yra tas, kad jie yra suderinami su esamomis temomis ir šablonais. Be to, dėl nuolatinių nuorodų naudojimo tinkinti įrašų tipai gerai sąveikauja su paieškos sistemomis.
Kodėl verta naudoti pasirinktinius įrašų tipus?
Priskirti įrašų tipai padeda saugoti skirtingų tipų įrašus skirtingose vietose. Tai padeda atskirti įprastus įrašus nuo kitų. tiek.
Papildinio kūrimas tinkintam įrašo tipui
Sukursime tinkinto įrašo tipo papildinį, kuriame bus rodomos geriausios filmų apžvalgos. Pradėkime.
1 veiksmas. Sukurkite „WordPress“ papildinio aplanką
Atidarykite „WordPress“ papildinių aplanką ir sukurkite naują aplanką Filmas-Recenzijos.
2 veiksmas: sukurkite PHP failą
Sukurtame aplanke sukurkite PHP failą Movie-Reviews.php
3 veiksmas: pridėkite antraštę
Atidarykite sukurtą failą ir viršuje įklijuokite antraštės kodą.
Prieš PHP komandos uždarymo žymą įveskite šią kodo eilutę create_movie_review . Kai jis inicijuojamas, jis vykdys atitinkamą tinkintą funkciją kiekvieną kartą, kai bus sugeneruotas puslapis.
Add_action("init", "sukurti_movie_review");
5 veiksmas: vykdykite funkciją
Kodas funkcijai create_movie_review vykdyti.
Funkcija create_movie_review() ( register_post_type("movie_reviews", array("labels" => array("name" => "Filmų apžvalgos", "singular_name" => "Filmo apžvalga", "add_new" => "Pridėti naują", "add_new_item" => "Pridėti naują filmo apžvalgą", "edit" => "Redaguoti", "edit_item" => "Redaguoti filmo apžvalgą", "new_item" => "Nauja filmo apžvalga", "view" => "Žiūrėti" ", "view_item" => "Peržiūrėti filmų apžvalgą", "search_items" => "Ieškoti filmų apžvalgų", "not_found" => "Nerasta filmų apžvalgų", "not_found_in_trash" => "Šiukšliadėžėje nerasta filmų apžvalgų", "parent" => "Parent Movie Review"), "public" => true, "menu_position" => 15, "palaiko" => array("pavadinimas", "redaktorius", "komentarai", "miniatiūra", " custom-fields"), "taksonomijos" => array(""), "menu_icon" => plugins_url("images/image.png", __FILE__), "has_archive" => true));)
Funkcija register_post_type mūsų atveju atliks didžiąją dalį darbo. Kai tik jis bus iškviestas, jis parengs WordPress konfigūraciją, reikalingą naujam vartotojo įrašui, įskaitant papildomas skiltis administratoriui. Funkcijai perduodami dviejų tipų argumentai: unikalus tinkinto įrašo tipo pavadinimas ir masyvas su jo savybėmis. Tai dar vienas masyvas su skirtingomis etiketėmis, nurodančiomis, kurios teksto eilutės bus rodomos skirtingose tinkinto įrašo tipo dalyse, pavyzdžiui: "name" rodo pasirinkto įrašo tipo pavadinimą valdymo skydelyje, "redaguoti" ir "žiūrėti" ekrano mygtukai Redaguoti Ir Žiūrėti. Manau, kad visi kiti argumentai kalba patys už save.
Taigi šiais argumentais:
- "public" => true nustato tinkinto įrašo tipo matomumą tiek administratoriaus valdymo skydelyje, tiek priekinėje dalyje.
- "menu_position" => 15 nurodo, kur meniu bus pasirinktas įrašo tipas.
- "palaiko" => array("pavadinimas", "redagavimo priemonė", "komentarai", "miniatiūra", "pasirinktiniai laukai") nurodo tuos pasirinktinius įrašo tipo atributus, kurie bus rodomi.
- "taxonomies" => array("") sukuria pasirinktines taksonomijas. Šiuo atveju jie nėra apibrėžti.
- "menu_icon" => plugins_url("images/image.png", __FILE__) rodo piktogramą administratoriaus meniu.
- "has_archive" => true leidžia archyvuoti pasirinktinius įrašų tipus.
Daugiau apie kitus argumentus, naudojamus priskirtuose įrašų tipuose, galite sužinoti puslapyje „WordPress Codex register_post_type“.
6 veiksmas: pasirinktinio įrašo tipo piktograma
Išsaugokite 16 x 16 pikselių piktogramą savo papildinio aplanke. Tai būtina, kad pasirinkto įrašo tipo valdymo skydelyje būtų piktograma.
7 veiksmas: suaktyvinkite papildinį
Suaktyvinkite papildinį ir galia, turite pasirinktinį įrašo tipą su galimybe redaguoti tekstą, įrašų, vaizdų, komentarų nustatymus ir pasirinktinį lauko redaktorių.

8 veiksmas: pridėkite naują įrašą
Pasirinkite Pridėti naują kad atidarytumėte pasirinktinio įrašo tipo redagavimo skydelį. Pridėkite filmo pavadinimą, peržiūros tekstą ir pasirinkite vaizdo miniatiūrą.
9 veiksmas: paskelbkite
Paskelbkite įrašą ir spustelėkite Žiūrėti filmo apžvalgą norėdami pamatyti sukurtą filmo apžvalgą.
Papildomų tinkintų įrašų tipų laukų kūrimas
Papildomų laukų (metadėžių) mechanizmas naudoja WordPress įmontuotą papildomų laukų sistemą. Tai padeda pridėti laukų, būdingų priskirtiems įrašų tipams, nenaudojant numatytųjų pasirinktinių laukų redaktoriuje.
1 veiksmas: užregistruokite pasirinktinę funkciją
Atidarykite failą Movie-Reviews.php ir prieš baigiamąją žymą pridėkite šį kodą. Šis kodas užregistruoja funkciją, kuri bus iškviesta apsilankius „WordPress“ administratoriaus skydelyje.
Add_action("admin_init", "my_admin");
2 veiksmas: vykdykite pasirinktinę funkciją
Pridėkite funkcijos vykdymą my_admin, kuri registruoja papildomus laukus ir susieja juos su priskirtu įrašo tipu movie_reviews.
Funkcija my_admin() ( add_meta_box("movie_review_meta_box", "Movie Review Details", "display_movie_review_meta_box", "movie_reviews", "normal", "high"); )
Šiuo atveju funkcija add_meta_box naudojama papildomiems laukams pridėti prie pasirinkto įrašo tipo. Apie atributus:
- Movie_review_meta_box būtinas atributas HTML ID
- Filmo peržiūros išsamios informacijos tekstas, kuris bus matomas papildomo lauko antraštėje
- display_movie_review_meta_box atgalinio skambinimo funkcija, kuri rodo papildomų laukų turinį
- movie_review yra tinkinto įrašo tipo pavadinimas, kuriame bus rodomi papildomi laukai
- normalus apibrėžia, kurioje puslapio vietoje bus rodomas redagavimo blokas
- aukštas nustato rodomų laukų prioritetą
3 veiksmas: Vykdykite funkciją display_movie_review_meta_box
ID, "movie_director", tiesa));| $filmo_vertinimas = intval(get_post_meta($filmo_review->ID, "movie_reting", true)); | |
| Kino režisierius |
žvaigždėsŠis kodas rodo papildomų laukų turinį. Tam naudojamas objekto kintamasis, kuriame pateikiama informacija apie kiekvieną redagavimo skydelyje rodomą filmų apžvalgą. Naudodami šį objektą gavome
Pašto ID
ir naudojo jį duomenų bazėje užklausai, kad gautų direktoriaus vardą ir įvertinimą, kurie savo ruožtu būtų rodomi ekrano laukuose. Pridedant naują įrašą, funkcija get_post_meta grąžins tuščią eilutę, o papildomi laukai bus tušti.4 veiksmas: užregistruokite įrašymo išsaugojimo funkciją
add_action("save_post", "add_movie_review_fields", 10, 2);
Ši funkcija iškviečiama, kai įrašas išsaugomas duomenų bazėje.5 veiksmas: paleiskite funkciją add_movie_review_fields
function add_movie_review_fields($movie_review_id, $movie_review) ( // Patikrinkite filmo apžvalgų įrašo tipą if ($movie_review->post_type == "movie_reviews") ( // Saugokite duomenis įrašo meta lentelėje, jei yra įrašo duomenyse if (isset($) _POST["movie_review_director_name"]) && $_POST["movie_review_director_name"] != "") ( update_post_meta($movie_review_id, "movie_director", $_POST["movie_review_director_name"]); ) if (isset_(filmo_režisieriaus_pavadinimas) ]) && $_POST["movie_review_review"] != "") ( update_post_meta($movie_review_id, "movie_review", $_POST["movie_review_review"]); ) ) )
Ši funkcija vykdoma, kai įrašai išsaugomi arba ištrinami administratoriaus skydelyje. Tokiu atveju patikrinamas gauto įrašo tipas, o jei įrašas yra pasirinktinis, dar kartą patikrinama, ar papildomi laukai turi kokių nors reikšmių, ir tada šios reikšmės išsaugomos šiuose laukuose. 6 veiksmas: išjunkite standartinius pasirinktinius laukus Kurdami pasirinktinį įrašo tipą nurodėme funkciją create_movie_review. Pašalinkite pasirinktinių laukų elementą iš palaikomų masyvo, nes mums jo nebereikės. Dabar, jei įrašote failą ir atidarote redagavimo skydelį Filmų apžvalgos, papildomuose laukuose pamatysite du laukus: Filmo autorius Ir
Filmo įvertinimas
Būtų teisinga, kad kiekvieno tipo vartotojo įrašas duomenims rodyti naudotų savo šablonus. Mūsų atveju sukursime šabloną, kuriame bus rodomos visos filmų apžvalgos, kurios buvo pridėtos naudojant pasirinktinį įrašo tipą Filmo apžvalga.
1 veiksmas: užregistruokite šablono paleidimo funkciją
Atidarykite failą Movie-Reviews.php ir prieš baigiamąją žymą pridėkite šį kodą. Šis kodas užregistruoja funkciją, kuri bus iškviesta apsilankius „WordPress“ administratoriaus skydelyje.
Add_filter("šablonas_įtraukti", "įtraukti_šablono_funkcija", 1);
2 veiksmas: vykdykite funkciją
function include_template_function($template_path) ( if (get_post_type() == "movie_reviews") ( if (is_single()) ( // pirmiausia patikrina, ar failas yra temoje, // kitaip pateikti failą iš papildinio if ($ theme_file = locate_template(masyvas ("single-movie_reviews.php"))) ( $template_path = $temos_failas; ) else ( $template_path = plugin_dir_path(__FILE__) . "/single-movie_reviews.php"; $template) ) ; return )Tai patikrina, ar dabartinis temos aplankas turi šabloną vienas-(post-type-name).php. Jei jo nėra, tada patikrinamas šablono buvimas įskiepio aplanke, kur mes patalpinsime savo šabloną kaip papildinio dalį. Template_include įvykių tvarkytuvas (hook) naudojamas norint pakeisti įprastą programos vykdymą ir priversti paleisti specialų šabloną.
3 veiksmas: sukurkite vieno puslapio šablono failą
Išsaugoję anksčiau atidarytą failą su papildiniu, sukurkite kitą failą pavadinimu single-movie_reviews.php ir įklijuokite į jį šį kodą.
have_posts()) : $kilpa->postas();?>
Pavadinimas: Direktorius:
Įvertinimas:
"; ) kitaip ( aidas "Šiuo atveju mes sukūrėme pagrindinį puslapio šabloną naudodami kilpą. Funkcija query_posts paima pasirinktinio įrašo tipo elementus ir rodo juos naudojant kilpą. Žinoma, tai labai paprastas ciklas, kurį galite pakeisti, jei reikia. Taip pat galite naudoti reikiamus CSS stilius, kad pakeistumėte išvaizdą.
Dėmesio
: Valdymo skydelyje turite sukurti naują puslapį naudodami sukurtą šabloną. 4 veiksmas: vaizdai, papildomuose laukuose pamatysite du laukus: Įskiepio aplanke išsaugokite du 32x32 pikselių žvaigždės piktogramos vaizdus. Pavadinkite juos atitinkamai icon.png

Visa dėklo sistema, kuri yra greitesnė nei dauguma, jei ne visos mikrosistemos. Ši sistema nėra skirta pradedantiesiems. Tai suteikia jums įrankių, bet kūrėjas turi juos įdiegti. Jei tikrai išmanote PHP, o našumas kelia susirūpinimą, daugiau neieškokite. Dokumentacija yra išsami, bet ne skirta pradedantiesiems, o bendruomenė yra šiek tiek menkas, bet negaliu pakankamai pabrėžti našumo. Ši sistema mano PHP programoms suteikia našumo lygį su JAVA programomis.
Mano požiūriu, „Phlacon“ yra ne tik greičiausia sistema rinkoje, bet ir siūlo įvairias funkcijas bei gražius komponentus. Taip pat labai gerai tinka naudoti kaip „MicroFramework“, kad būtų galima pailsėti API arba visa MVC sistema. Yra su C ORM ir šakelių šablonų varikliu. Taip pat labai vertinu tai, kad sistema yra dinamiška, jūs naudojate tik tai, ko norite, galite tiesiog pakeisti klasėms ir bibliotekoms pritaikytoms arba įtakos srautui su įvykiais.
Labai geras darbas, tik viena problema yra bendruomene, bet tikiu, kad ji augs labai greitai:)
„Phalcon“ neabejotinai yra viena greičiausių sistemų, ir tai yra jos stiprioji pusė. Kita vertus, dokumentacija yra šiek tiek netvarkinga, žiniatinklio įrankiai (kodo generatorius) turi didelių problemų sistemoje „Windows“ ir jos vis dar trūksta. labiau bendruomenė, padedanti naujiems kūrėjams, bet dar kartą – našumas, WOW.
Gaukite vertingų atsiliepimų iš savo klientų, suteikdami jiems laisvę laisvai dalytis savo įspūdžiais. Leiskite jiems įvertinti jūsų produktus ir (arba) paslaugas tiesiai jūsų svetainėje. Žemiau rasite pagrindines mūsų internetinės peržiūros sistemos funkcijas.
Atsiliepimai ir įvertinimai
Įdėkite PHP peržiūros scenarijų į savo svetainę ir leiskite klientams dalytis patirtimi su jūsų siūlomais produktais ir paslaugomis. Jie gali vertinti pagal kriterijus ir pateikti tiek teigiamų, tiek neigiamų atsiliepimų.
Kelios kalbos
PHP peržiūros sistema gali kalbėti ne tik angliškai, bet bet kuria kalba, kurios jums gali prireikti. Galite išversti visus pavadinimus ir sistemos pranešimus iš administratoriaus puslapio naudodami unikalius kiekvienos teksto dalies ID.
Redaguojami vertinimo kriterijai
Atsižvelgdami į verslo tipą, peržiūros sistemos administratoriai gali
nustatyti skirtingus vertinimo kriterijus, kurie bus rodomi priekinėje formoje.
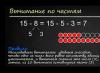
Kiekvienas iš šių kriterijų įvertintas nuo 1 iki 5 žvaigždučių.
El. pašto ir SMS pranešimai
Nustatykite internetinę peržiūros sistemą, kad paskelbus naują apžvalgą būtų išsiųsti įspėjimai el. paštu ir SMS. Naudotojų meniu galite lengvai nurodyti, kuriems vartotojams reikia gauti šiuos pranešimus.
Keli vartotojų tipai
Kurkite neribotą klientų tipų skaičių, priklausomai nuo pramonės ir naudojamų paslaugų. Viešbučių įvertinimai gali būti taikomi šių tipų naudotojams: šeima su vaikais, pora, verslo kelionė ir kt. Apžvalgose jie rodomi kaip etiketės.
Atsakingas ir patrauklus
Peržiūros ir įvertinimo scenarijus veikia visuose įrenginiuose ir sklandžiai prisitaiko prie įvairių ekranų dydžių. Atsižvelgdami į savo svetainės prekės ženklą, galite pasirinkti geriausiai atitinkančią priekinės dalies temą iš 10 spalvų parinkčių.
Greitų patarimų laukelis šalia apžvalgos formos leidžia pridėti keletą šmaikščių žodžių ir atkreipti klientų dėmesį. Apžvalgos sistema filtruoja atsiliepimus pagal vartotojo tipą. Klientai taip pat gali įvertinti kitų klientų įvertinimus.
Turėdami kūrėjo licenciją gausite šaltinio kodą ir galėsite atlikti bet kokius pasirinktinius PHP peržiūros scenarijaus pakeitimus. Mes taip pat galime pakeisti klientų peržiūros sistemą pagal pageidavimą.
Pirma, kodo organizavimo požiūriu, geriau būtų sudėti visą peržiūros logiką į vieną ar kelis įtrauktus failus ir tada įtraukti jį į produktų puslapius:
Include("includes/reviews.php");
Tokiu būdu produktų puslapiai gali likti nesugadinti, o tą patį peržiūros kodą galima lengvai naudoti arba, jei reikia, modifikuoti. Reviews.php scenarijus atliktų keletą dalykų:
- Parodykite peržiūros formą
- Tvarkykite peržiūros formą
- Išvardykite esamas apžvalgas
- Tvarkyti antrinius veiksmus, pvz., pažymėti atsiliepimus ar komentarus kaip netinkamus, nurodyti, kad atsiliepimai buvo naudingi, pridėti komentarų prie atsiliepimų, nurodyti, kad komentarai yra naudingi ir pan.
Tikimės, kad jau atlikote daug žiniatinklio kūrimo, todėl žinote, kad atsiliepimų pridėjimo forma būtų tokia:
Aišku, kad norėtumėte naudoti šiek tiek CSS, kad jis būtų gražus, bet tai yra pagrindinė idėja. Pagrindinis trūkumas yra tas, kad produkto ID ir produkto tipas (arba bet koks dalykas, kurį turi turėti duomenų bazė, kad būtų galima susieti apžvalgą su preke) turi būti saugomi paslėptuose įvestiuose. Turėtumėte PHP scenarijų, kuriame rodomas produktas, įrašyti šias reikšmes į įvestis.
Jei reikia prisijungti, galite pridėti (PHP) kodą, kuris rodo formą tik prisijungusiems vartotojams, arba atspausdina komentarą, kuriame sakoma, kad vartotojas turi prisijungti, kad peržiūrėtų produktą. Panašiai, jei turite sistemą, užtikrinančią, kad asmuo tik vieną kartą peržiūrės produktą, prieš rodydami šią formą turėtumėte, kad PHP patikrintų tą scenarijų.
Formos pateikimas galėtų eiti į naują puslapį, bet tada vartotojas turės spustelėti mygtuką Atgal, kad grįžtų į produkto puslapį, o tai nėra idealu. Vietoj to pateikčiau formą atgal į produkto puslapį. Pavyzdžiui, bet kurioje dinamiškoje svetainėje tas pats PHP scenarijus naudojamas visam konkretaus tipo turiniui rodyti. Mano Lengva elektroninė prekyba su PHP ir MySQL knyga, pirmasis svetainės pavyzdys naudoja scenarijų page.php bet kuriam turinio puslapiui rodyti. Formos veiksmo atributas nurodytų tą patį puslapį.php . Tai galite padaryti tiesiog palikdami atributą tuščią arba naudodami PHP dinamiškai nustatydami reikšmę.
Jei PHP puslapyje, kuriame pateikiami produktai, reikia, kad URL būtų perduota vertė, identifikuojanti produktą, forma taip pat turės išsaugoti šią vertę paslėptoje įvestyje. (Taip jau gali būti įvedant produkto_id, atsižvelgiant į tai, kaip svetainė nustatyta.) Antra, produkto scenarijų taip pat reikės atnaujinti, kad produkto vertė būtų gauta naudojant POST .
Kad reviews.php scenarijus žinotų, kada tvarkyti formos pateikimą, jis gali patikrinti, kaip buvo pasiektas scenarijus:
If ($_SERVER["REQUEST_METHOD"] == "POSTAS") ( // Tvarkykite formą.
Pateikus peržiūros formą, formos duomenys turi būti patvirtinti. Taip pat duomenims turėtumėte taikyti strip_tags(), kad išvengtumėte kelių svetainių scenarijų (XSS) atakų ar kitokio blogo elgesio. O ne skaitinės reikšmės būtų paleidžiamos per pabėgimo funkciją, pvz., mysqli_real_escape_string() . Arba galite tiesiog naudoti paruoštus pareiškimus arba išsaugotas procedūras, kad užtikrintumėte didesnį saugumą ir našumą.
Jei pridėsite prieraišą prie formos veiksmo atributo action="page.php#reviews"pateikęs naudotoją bus nukreiptas į puslapio apžvalgų skiltį, o tai yra malonu.
Jei reviews.php scenarijus taip pat tvarko kai kuriuos kitus veiksmus, netinkamus atsiliepimus ar komentarus, naudingus rodiklius ir pan., scenarijus taip pat turės stebėti tuos pateikimus. Naudočiau paslėptas įvestis, pavadintas „užduotis“, kad nurodyčiau, koks veiksmas atliekamas.
Atskirame straipsnyje parodysiu, kaip naudoti „Ajax“ paprastai vertinimo sistemai. Panašus Ajax kodas taip pat gali būti naudojamas peržiūros sistemai.